3x3 Rubik Tips: Introduction Rubik, Notation, and Cross
3x3 Rubik Tips: Introduction Rubik, Notation, and Cross
I want to share tips on how to complete the Rubik. Who does not know what it rubik? Rubik's cube was a colorful. Architecture invented by Hungarian Erno Rubik. Each side of the cube is divided into nine surface and have the six colors. But at the moment many variations of Rubik among others Rubik 3x3, 4x4, 5x5, Pyraminx, Megaminx, etc. If you want to create variations of itself may also be. In this post I want to share tips complete the Rubik. but only in the early stages. namely the introduction of parts rubik and settlement cross.
Actually a lot of video tutorials on Rubik. In the Indonesian version too much. Try it ajarindongkk search on youtube. there tutorial about rubik very much. Ranging from 3x3 up to 7x7 Rubik tutorial, even blinfolded (BLD / close eyes).
Okay, I'm here just want to write resolve Rubik tips for beginners like me. The method is usually used Fridrich method, or better known as CFOP method invented by Jessica Fridrich. This method is a method of solving Rubik Layer by Layer or Line by Line. I do not think this method is quite difficult to learn. and by using this method we can solve Rubik in under 1 minute. even record up to 5 seconds.
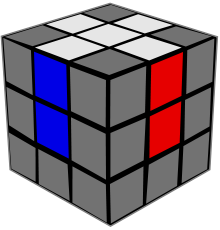
Parts rubik
Ya i would love to know a part-Baian Rubik. first of all we must know the parts Rubik. as the saying goes "do not know it was love" then we must know the parts rubik let us love him (so .. sweet ..) Rubik consists of:
- 8 corner (corner section, consisting of three colors or stickers)
- 12 edge (center side, consists of two colors or stickers)
- 6 center (the middle part, consists of a sticker)
see the following picture.

notation
Prior to the steps berikutnya.Yang first I want to tell is about the notation. Rubik's notation that the direction should be played. ga maybe we can solve the Rubik if ga which side should be played and where they lead.
The notation is as follows:
R: Right, which means the right side of the Rubik's rotating clockwise
R ': on the same side, but rotated anticlockwise
L: Left, which means the left side of the Rubik's rotating clockwise
L ': on the same side, but rotated anticlockwise
F: Front, which means playing the front side of the Rubik clockwise
F ': on the same side, but anticlockwise
U: Up, which means rotating the upper side of the Rubik clockwise
U ': on the same side, but anticlockwise
D: Down, which means playing the bottom side clockwise rubik
D ': on the same side, but anticlockwise
B: Back, which means playing the back side of the Rubik clockwise
B ': on the same side, but anticlockwise
for more details see the following picture.


Notation completed. Now to the next stage
Cross
At this stage, we formed a Cross or a cross shape on one side of the Rubik. That pair Edge on Center 4 on one side. As shown below.
But, I was a bit difficult for ngejelasin how. Actually how to resolve the cross could dilogika. for example in the above image we want to create a white cross on the side. We stayed nyari 4 Edge scrambled on Rubik. And plugging in centernya (center which was white, not green).
Post a Comment for "3x3 Rubik Tips: Introduction Rubik, Notation, and Cross"